一、gitlab简介:
GitLab是利用Ruby On Rails开发的一个开源版本管理系统,实现了一个自托管的Git项目仓库,是集代码托管,测试,部署于一体的开源git仓库管理软件,可通过web界面来进行访问公开的或私人项目。与Github类似,GitLab能够浏览代码,管理缺陷和注释。可以管理团队对仓库的访问,它非常易于浏览提交过的版本,并提供一个文件历史库。它还提供一个代码片段收集功能可以轻松实现代码复用,便于日后需要的时候查找。
二、安装环境:
操作系统:CentOS Linux release 7.4.1708 (Core)
Gitlab 版本:gitlab-ce-10.3.3
安装方式:由于源代码的安装需要安装很多软件包在过程中可能会出错,所以此用官方推荐的omnibus软件包安装方式,Omnibus软件包更可靠的一个原因是它使用Runit重新启动任何GitLab进程以防万一崩溃。在大量使用的GitLab实例上,Sidekiq后台工作的内存使用量将随着时间的推移而增长。Omnibus软件包通过让Sidekiq如果使用太多内存而终止来解决这个问题。在这个终止之后,Runit会检测到Sidekiq有没有运行,如果没有会启动它。由于从源代码安装没有Runit,Sidekiq无法终止,其内存使用量将随着时间的推移而增长。
三、安装所有依赖软件:
[root@gitlab-ce yum.repos.d]# yum install curl policycoreutils openssh-server openssl-clients
[root@gitlab-ce yum.repos.d]# systemctl enable sshd
[root@gitlab-ce yum.repos.d]# systemctl start sshd
[root@gitlab-ce yum.repos.d]# firewall-cmd —permanent —add-service=http //防火墙允许http访问
[root@gitlab-ce yum.repos.d]# systemmctl reload firewalld
四、安装postfix:
[root@gitlab-ce yum.repos.d]# yum -y install postfix
[root@gitlab-ce yum.repos.d]# systemctl enable postfix
[root@gitlab-ce yum.repos.d]# systemctl start postfix
//postfix将会向你发送通知邮件
五、添加gitlab软件库并安装软件包:
[root@gitlab-ce yum.repos.d]# curl https://packages.gitlab.com/install/repositories/gitlab/gitlab-ee/script.rpm.sh|bash
[root@gitlab-ce yum.repos.d]# yum -y install gitlab-ce
//安装成功后将会显示如下图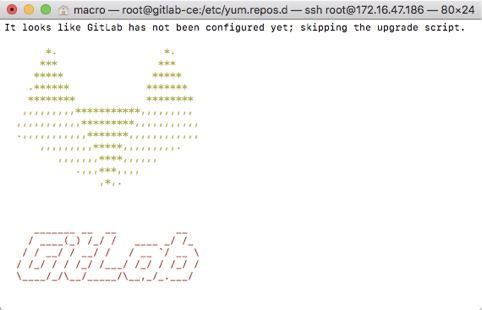
六、配置gitlab配置文件:
[root@gitlab-ce yum.repos.d]# grep -n ^[a-z] /etc/gitlab/gitlab.rb
13:external_url ‘http://172.16.47.186‘ //将ip修改成服务器IP
[root@gitlab-ce yum.repos.d]# gitlab-ctl reconfigure //会在前台检测配置文件,检查完后没有发现error即配置文件没有错误
[root@gitlab-ce yum.repos.d]# gitlab-ctl start
ok: run: gitaly: (pid 2795) 745s
ok: run: gitlab-monitor: (pid 2827) 741s
ok: run: gitlab-workhorse: (pid 2782) 745s
ok: run: logrotate: (pid 2421) 844s
ok: run: nginx: (pid 2404) 850s
ok: run: node-exporter: (pid 2490) 832s
ok: run: postgres-exporter: (pid 2851) 739s
ok: run: postgresql: (pid 2181) 923s
ok: run: prometheus: (pid 2837) 740s
ok: run: redis: (pid 2121) 929s
ok: run: redis-exporter: (pid 2527) 815s
ok: run: sidekiq: (pid 2376) 866s
ok: run: unicorn: (pid 2338) 872s
七、访问http://localhost/:
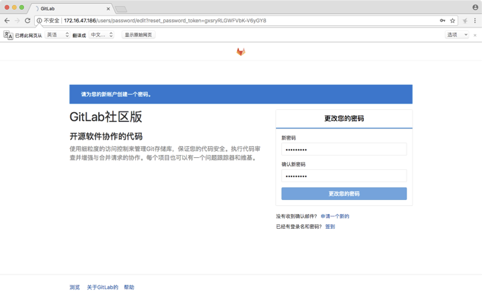
//第一次登陆会强制要求你设置新密码,默认用户名是root,然后输入你刚修改的密码即可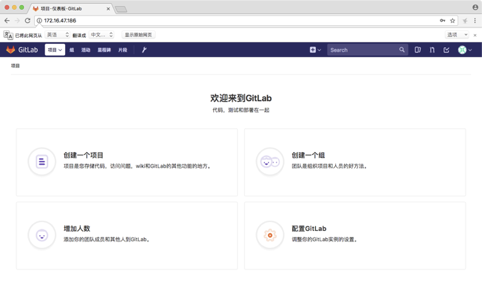
八、设置gitlab发送邮件通知:
[root@gitlab-ce ~]# vim /etc/gitlab/gitlab.rb
gitlab_rails[‘gitlab_email_from’] = ‘xx@163.com’ //你的邮箱地址
gitlab_rails[‘smtp_enable’] = true //启用smtp
gitlab_rails[‘smtp_address’] = “smtp.163.com” //设置你的smtp服务器
gitlab_rails[‘smtp_port’] = 25 //smtp端口
gitlab_rails[‘smtp_user_name’] = “xx@163.com” //你的邮箱登陆名
gitlab_rails[‘smtp_password’] = “password” //你的邮箱登陆密码
gitlab_rails[‘smtp_domain’] = “163.com” //你的邮箱所在域
gitlab_rails[‘smtp_authentication’] = “login” //验证方式
user[‘git_user_email’] = “xx@163.com” //你的邮箱地址
#修改完后保存退出
[root@gitlab-ce ~]# gitlab-ctl reconfigure //重新加载配置文件
[root@gitlab-ce ~]# gitlab-ctl restart //重启服务
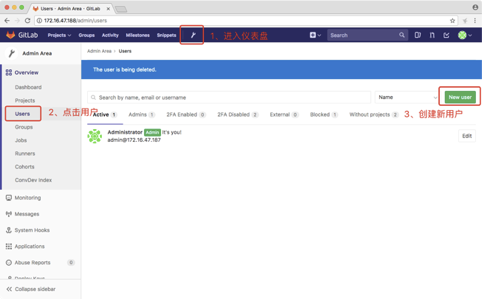
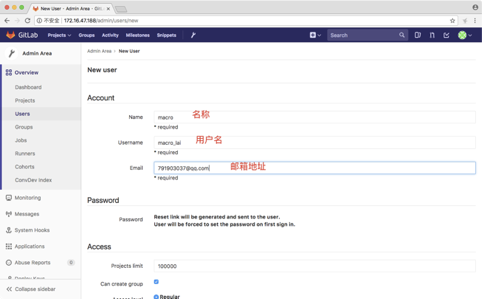
打开邮件通知并创建用户验证: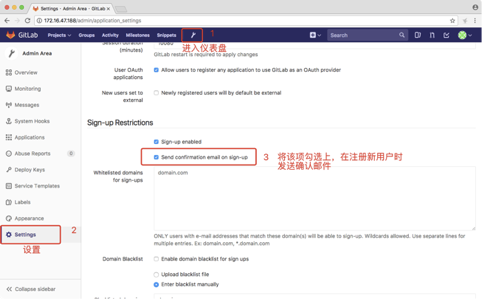
到qq邮箱上查看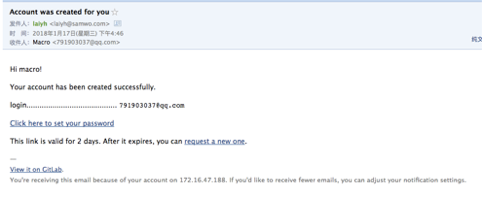
//到此为止邮箱的配置就完成了
九、创建项目并上传代码:
#用刚刚创建的账户登陆网页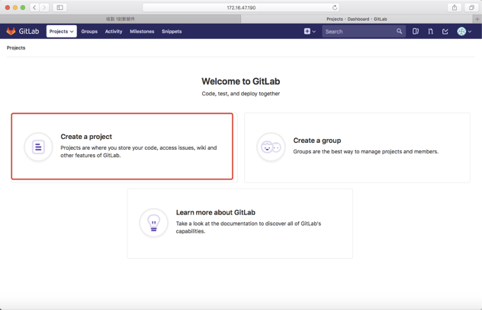

权限解释:
Private 项目访问必须明确授权用户
Internal 该项目可以被任何登陆用户访问
Public 该项目可以不经任何认证访问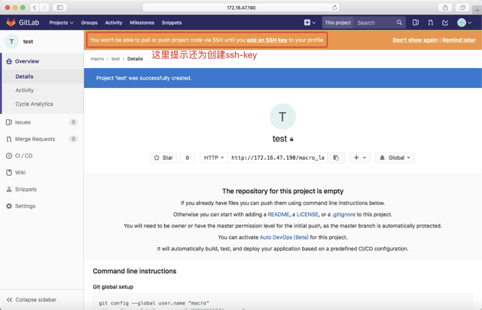
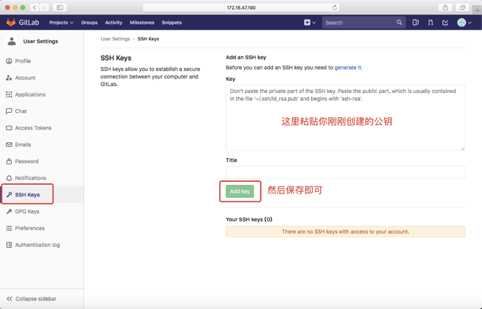
创建ssh-key并上传到gitlab
[root@gitlab-ce ~]# ssh-keygen -t rsa -C “your_email” //安照提示操作
[root@gitlab-ce ~]# cat ~/.ssh/id_rsa.pub //将key复制到gitlab并保存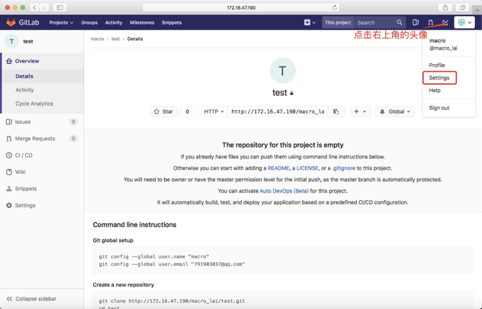
配置git全局信息:
[root@gitlab-ce ~]# git config –global user.name “macro”
[root@gitlab-ce ~]# git config –global user.email “791903037@qq.com”
[root@gitlab-ce ~]# git config —-list //获取git配置信息
user.email=791903037@qq.com
user.name=macro
core.repositoryformatversion=0
core.filemode=true
core.bare=false
core.logallrefupdates=true
remote.oriin.url=791903037@qq.com:macro_lai/test.git
remote.oriin.fetch=+refs/heads/:refs/remotes/oriin/
remote.origin.url=git@172.16.47.188:macro_lai/test.git
remote.origin.fetch=+refs/heads/:refs/remotes/origin/
创建新的存储库
[root@gitlab-ce ~]# mkdir /test && cd /test //创建本地项目目录
[root@gitlab-ce test]# git init //初始化git仓库
[root@gitlab-ce test]# ls -la
total 0
drwxr-xr-x 3 root root 35 1月 18 11:33 .
drwxr-xr-x 3 root root 18 1月 18 11:17 ..
drwxr-xr-x 8 root root 166 1月 18 11:34 .git
//你会发现目录下会多了一个.git的文件
[root@gitlab-ce test]# touch README.md //创建一个文件
[root@gitlab-ce test]# git add README.md //将文件添加到暂存区
[root@gitlab-ce test]# git commit -m “add README” //提交暂存区的文件
[root@gitlab-ce test]# git push -u origin master //将文件推送到远程服务器
//通过上图发现文件已经上传到了远程服务器上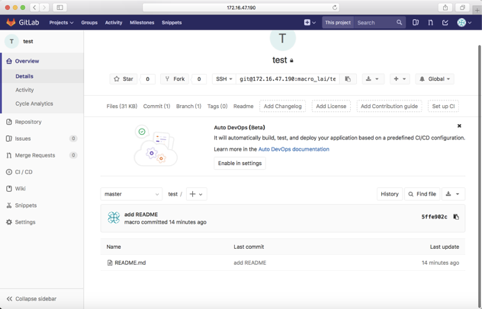
十、gitlab备份与恢复:
gitlab数据备份(本方式只适合omnibus安装到gitlab)
[root@gitlab-ce test]# gitlab-rake gitlab:backup:create
Dumping database …
Dumping PostgreSQL database gitlabhq_production … [DONE]
done
Dumping repositories …
- macro_lai/test … [DONE]
- macro_lai/test.wiki … [SKIPPED]
- root/123 … [SKIPPED]
- root/123.wiki … [SKIPPED]
done
Dumping uploads …
done
Dumping builds …
done
Dumping artifacts …
done
Dumping pages …
done
Dumping lfs objects …
done
Dumping container registry images …
[DISABLED]
Creating backup archive: 1516247863_2018_01_18_10.3.3_gitlab_backup.tar … done
Uploading backup archive to remote storage … skipped
Deleting tmp directories … done
done
done
done
done
done
done
done
Deleting old backups … skipping
[root@gitlab-ce test]# cd /var/opt/gitlab/backups/ //gitlab备份文件默认存储在这路径下
[root@gitlab-ce backups]# ls
1516247863_2018_01_18_10.3.3_gitlab_backup.tar //发现已经备份好了
gitlab从备份中恢复:
[root@gitlab-ce backups]# gitlab-ctl stop unicorn
ok: down: unicorn: 0s, normally up
[root@gitlab-ce backups]# gitlab-ctl stop sidekiq
ok: down: sidekiq: 0s, normally up
[root@gitlab-ce backups]# gitlab-rake gitlab-backup:restore BAKCKUP=1516247863_2018_01_18_10.3.3 //备份文件名的时间戳前缀
[root@gitlab-ce backups]# gitlab-ctl start
[root@gitlab-ce backups]# gitlab-rake gitlab:check SANITIZE=true
配置定时任务,自动备份gitlab:
[root@gitlab-ce ~]# vim /etc/crontab
0 2 * /usr/bin/gitlab-rake gitlab:backup:create CRON=1
附录:
修改存储路径:
[root@gitlab-ce ~]# mkdir -p /data/gitlab/data
[root@gitlab-ce ~]# vim /etc/gitlab/gitlab.rb
git_data_dirs({
“default” => {
“path” => “/data/gitlab/data”
}
})
[root@gitlab-ce ~]# gitlab-ctl reconfigure
[root@gitlab-ce ~]# gitlab-ctl restart
修改日志存放路径:
[root@gitlab-ce ~]# mkdir -p /data/gitlab/log
[root@gitlab-ce ~]# vim /etc/gitlab/gitlab.rb
gitlab_rails[‘log_directory’] = “/data/gitlab/log
[root@gitlab-ce ~]# gitlab-ctl reconfigure
[root@gitlab-ce ~]# gitlab-ctl restart
git常用命令:
克隆远程仓库:git clone git://172.16.47.188/macro_lai/test.git
初始化目录:git init (例如现在在test目录下,test目录将会初始化为git的代码库)
添加文件到暂存区:git add [file1](如果一次添加多个文件到话以空格分隔即可)
添加指定目录到暂存区:git add [dir]
添加当前目录到所有文件到暂存起:git add .
将暂存区的文件提交到存储区:git commit -m [message]
推送存储区到远程仓库:git push -u origin master
查看仓库状态:git status
查看提交日志:git log
查看远程仓库:git remote -v
添加远程仓库:git remote add [name] [url]
删除远程仓库:git remote rm [name]
修改远程仓库:git remote set-url –push[name][newUrl]
拉取远程仓库:git pull [remoteName] [localBranchName]
推送远程仓库:git push [remoteName] [localBranchName]
新建分支:git branch [branch-name](但依然停留在当前分支)
新建分支并切换到该分支:git checkout -b [branch]
合并指定分支到当前分支:git merge
版本回滚:git reset —hard HEAD(HEAD表示当前版本加^就是上一个版本,如果你想回滚到上10个版本可以写成HEAD~10)
查看历史命令:git reflog
删除文件:git rm file
分布式备份:
利用RAS key代替密码登陆,这样在脚本中ssh就不需要登陆密码或在脚本中写入;
[root@backup .ssh]# vim /etc/ssh/sshd_config
RSAAuthentication yes
[root@backup .ssh]# systemctl restart sshd
[root@backup .ssh]# ssh-keygen -t rsa
Generating public/private rsa key pair.
Enter file in which to save the key (/root/.ssh/id_rsa):
Enter passphrase (empty for no passphrase):
Enter same passphrase again:
Your identification has been saved in /root/.ssh/id_rsa.
Your public key has been saved in /root/.ssh/id_rsa.pub.
The key fingerprint is:
SHA256:ra7kGFsl3rhNUvIMeSoXC6KWdjz4afXqyLt9pTeqSlE root@gitlab-ce
The key’s randomart image is:
+—[RSA 2048]—-+
| |
| |
| E |
| . . . |
| … * S . |
| .+..+ / o |
|.= =+ @ O |
|o =.=X X o |
| .OB=Bo= . |
+—-[SHA256]—–+
#测试本地登陆:
[root@backup .ssh]# ssh localhost
The authenticity of host ‘localhost (::1)’ can’t be established.
ECDSA key fingerprint is SHA256:Qu0jbp/fB5lYWWUkK/JCcorGo0O+Akibn30c+hUrPmc.
ECDSA key fingerprint is MD5:84:c6:42:c3:7b:bf:6d:39:4a:c2:33:88:04:b0:90:1c.
Are you sure you want to continue connecting (yes/no)? yes
Warning: Permanently added ‘localhost’ (ECDSA) to the list of known hosts.
Last login: Mon Jan 22 15:24:46 2018 from 172.16.47.199
[root@backup .ssh]#
#将公钥复制到远程服务器上:
[root@backup .ssh]# ssh-copy-id -i id_rsa.pub root@172.16.47.198
/usr/bin/ssh-copy-id: INFO: Source of key(s) to be installed: “id_rsa.pub”
/usr/bin/ssh-copy-id: INFO: attempting to log in with the new key(s), to filter out any that are already installed
/usr/bin/ssh-copy-id: INFO: 1 key(s) remain to be installed – if you are prompted now it is to install the new keys
root@172.16.47.198’s password:
Number of key(s) added: 1
Now try logging into the machine, with: “ssh ‘root@172.16.47.198’”
and check to make sure that only the key(s) you wanted were added.
//测试通过在backup机器上ssh到gitlab服务器上
#编写备份脚本:
[root@backup .ssh]# cat bakgitlab.sh
#!/bin/sh
user=root
host=172.16.47.198
datapath=”/var/opt/gitlab/backups/“
backuppath=”/backup”
if [ ! -d “$backuppath” ]; then
rsync -avz –delete $user@$host:$datapath $backuppath
else
mkdir $backuppath
rsync -avz –delete $user@$host:$datapath $backuppath
fi
#将脚本保存添加到定时任务执行:
[root@backup .ssh]# vim /etc/crontab
0 0 * root /data/script/bakgitlab.sh